Step 4: Set-Up Alerts (Optional)
Configuring Alert Destination
Before adding an alert, you need to setup an alert destination. Currently we offer Slack and Email as Alert Channels. Please see the Alerts section for more information.

Once you've configured the channel, you can start setting up alerts for the chosen KPIs.
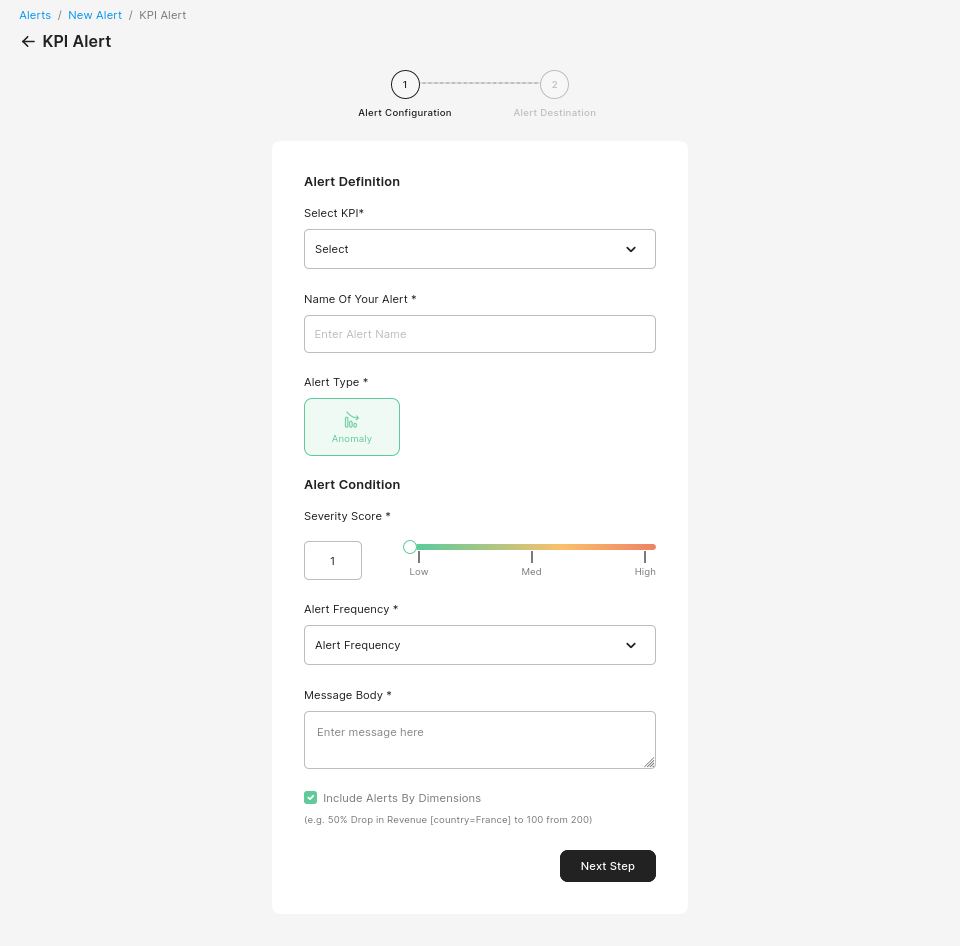
Setting up KPI Alerts
To setup an Alert, you first have to click the New Alert button, select KPI Alert and then fill in the following fields:
Select KPI : Select the KPI for which you want to set up the alert
Name of your Alert : Provide a name for the alert
Alert Type: Currently, you can only setup alerts for Anomaly Detection for a KPI.
Severity Score: You can select the Severity Score threshold above which you'll be sent an alert. If your data point is an anomaly and has a severity score greater than your threshold, an alert will be sent.
Alert Frequency: How frequently will the alert be sent. We offer Daily or Hourly Alerts.
Message Body: This is the message you want accompanied when the alert is sent to you.
Include Alerts By Dimensions: If enabled, alerts will be sent for sub-dimensional anomalies too. Note: even if this is disabled, you will still receive sub-dimensions responsible for anomalies in the overall KPI.
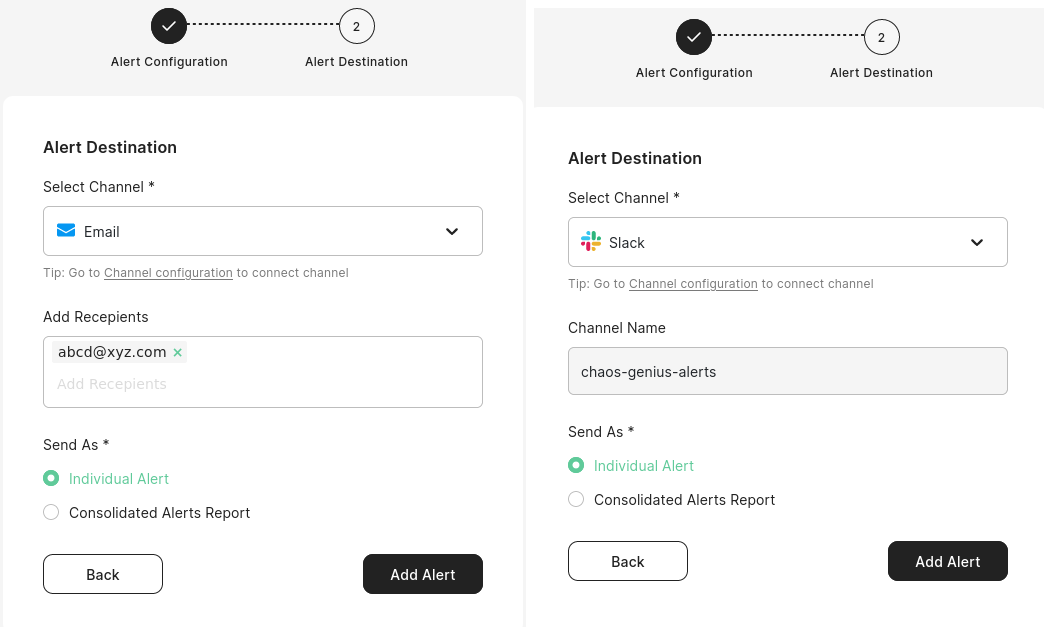
Select Channel: Channel on which you want to receive the alert at. Currently you can choose between either :
Email: You can add recipient emails. Press enter after typing an email to add it to the list.
Slack: You can select the channel to which the alert will be triggered.
Send as: Here you can select whether you want alerts to be sent individually (as soon as anomaly is computed) or as a daily consolidated report once a day at the configured time.
note
Consolidated Reports need to be configured to receive them.
For more information on setting up alerts, please visit the Alerts section.
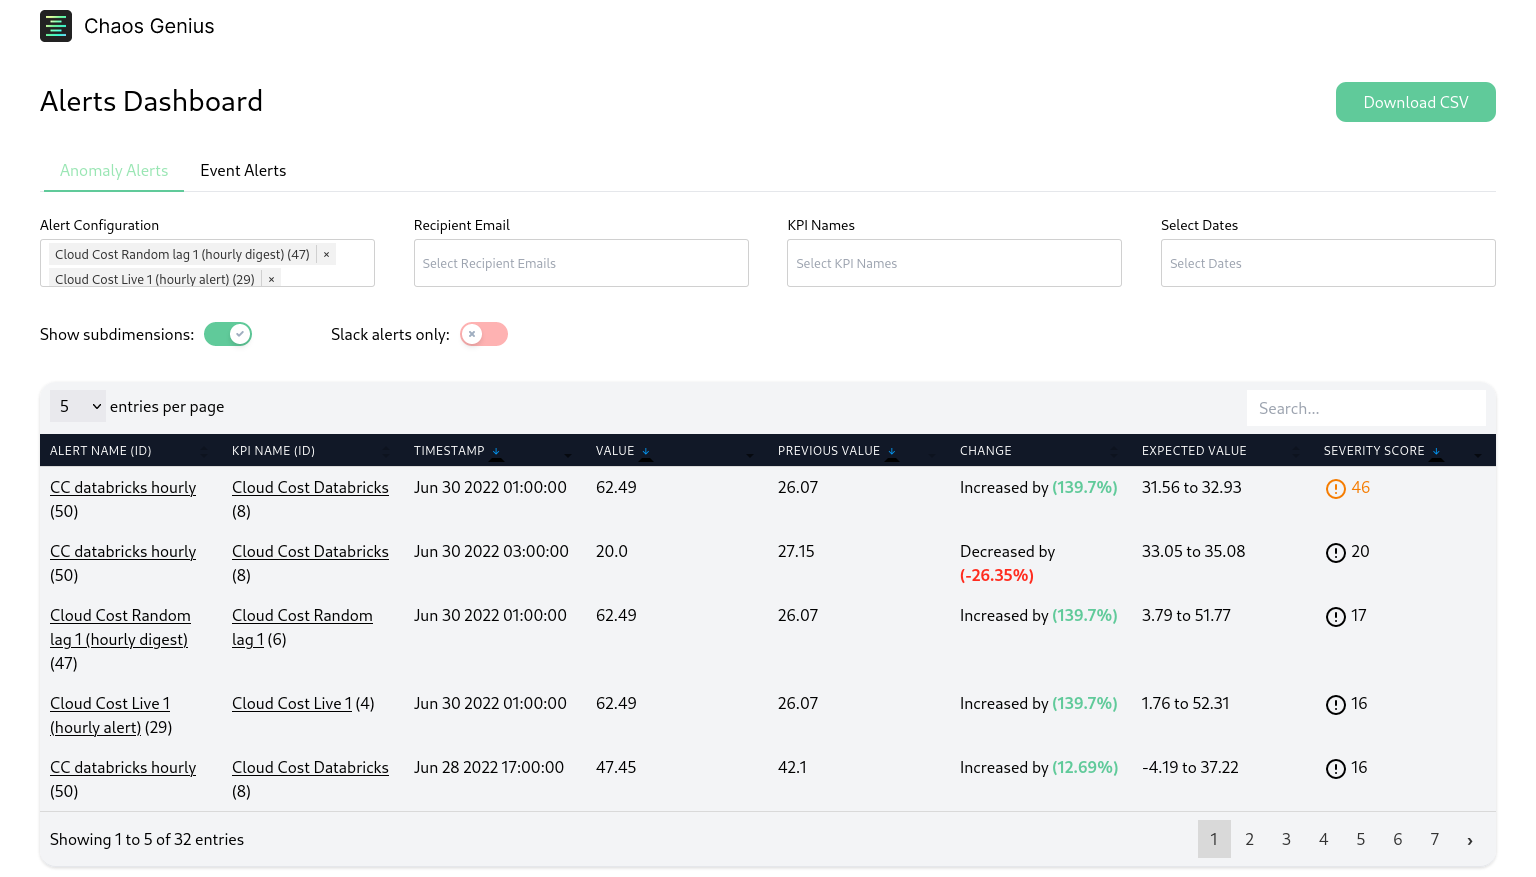
Alerts Dashboard
The dashboard shows all of the alerts triggered in the past week.
You can navigate to the alerts dashboard by clicking on the Alerts heading on the alerts page, or by navigating to <your-ip-or-hostname>/api/digest (for local installs, this will be http://localhost:8080/api/digest).
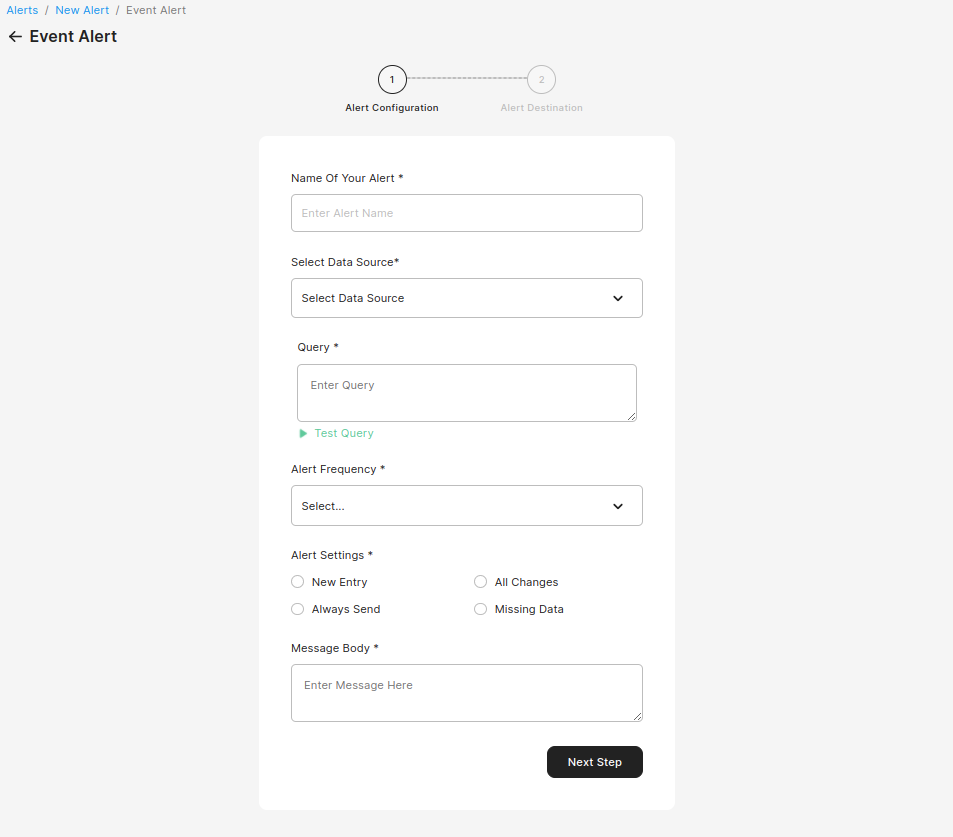
Setting up Event Alerts
To setup an Alert, you first have to click the New Alert button, select Event Alert and then fill in the following fields:
Name of your Alert: Provide a name for the alert.
Select Data Source: Data Source you will be using to define the event.
Query: Define the query used to fetch the data.
Alert Frequency: How frequently will the alert be sent.
Alert Settings:
New Entry: This option will send an alert if any new entries are added to the data.
All changes: This option will alert if there is any change to your data (addition or deletion).
Always Send: Sends data from the query on every run.
Missing: Sends alerts if you have any missing data.
Message Body: This is the message you want accompanied when the alert is sent to you.
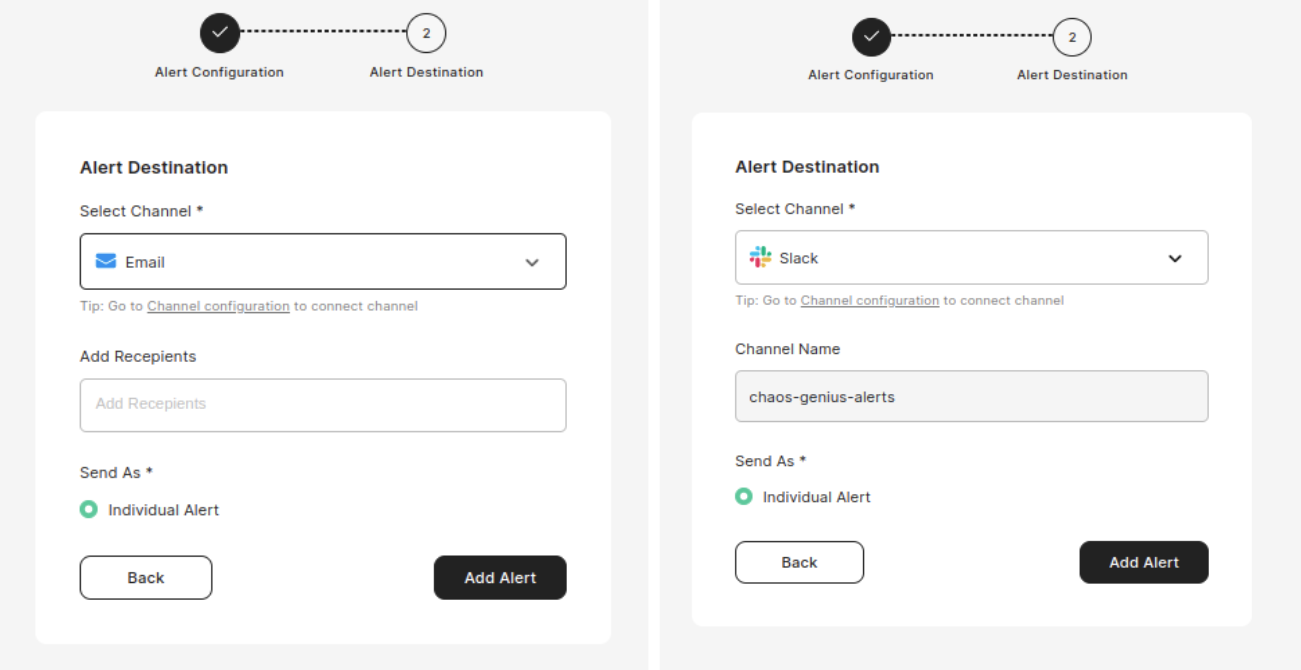
Select Channel: Channel on which you want to receive the alert at. Currently you can choose between either :
Email: You can add recipient emails. Press enter after typing an email to add it to the list.
Slack: You can select the channel to which the alert will be triggered.